Lunar Base
A 3D scene completed independently: Maya modeling, materials, scene assembly and lighting.
Role
Environment Artist (solo)
Engine
Maya + Substance Painter + Arnold + AE
Team
Solo project
Duration
2025
Overview
A lunar base interior built entirely on my own for the 3D Modelling course. Rather than present this as a gallery of renders, this page reviews it the way an environment artist would review a scene: stage by stage down the art pipeline, noting where each stage broke and what the fix cost.
The final scene runs roughly 426,000 triangles across 216,000 vertices, textured with 2048 × 2048 PBR sets authored per asset. The pipeline is a conventional one:
Blockout → mesh cleanup → UV → Substance Painter → material assignment and lookdev in Maya under ACES → set dressing and foliage → Arnold lighting and render → After Effects comp.
The single most useful thing I took from building it is that these stages are not a queue you walk down once. Cleanup is a gate, and skipping it early meant paying at every gate after.
1. Blockout & Modelling
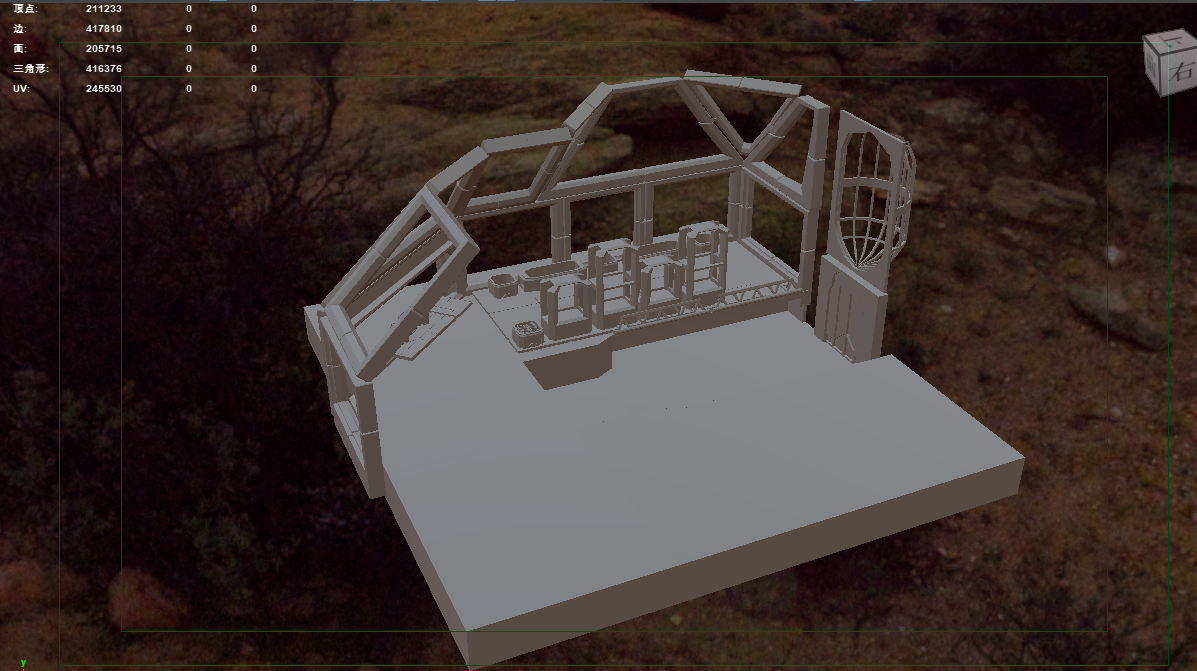
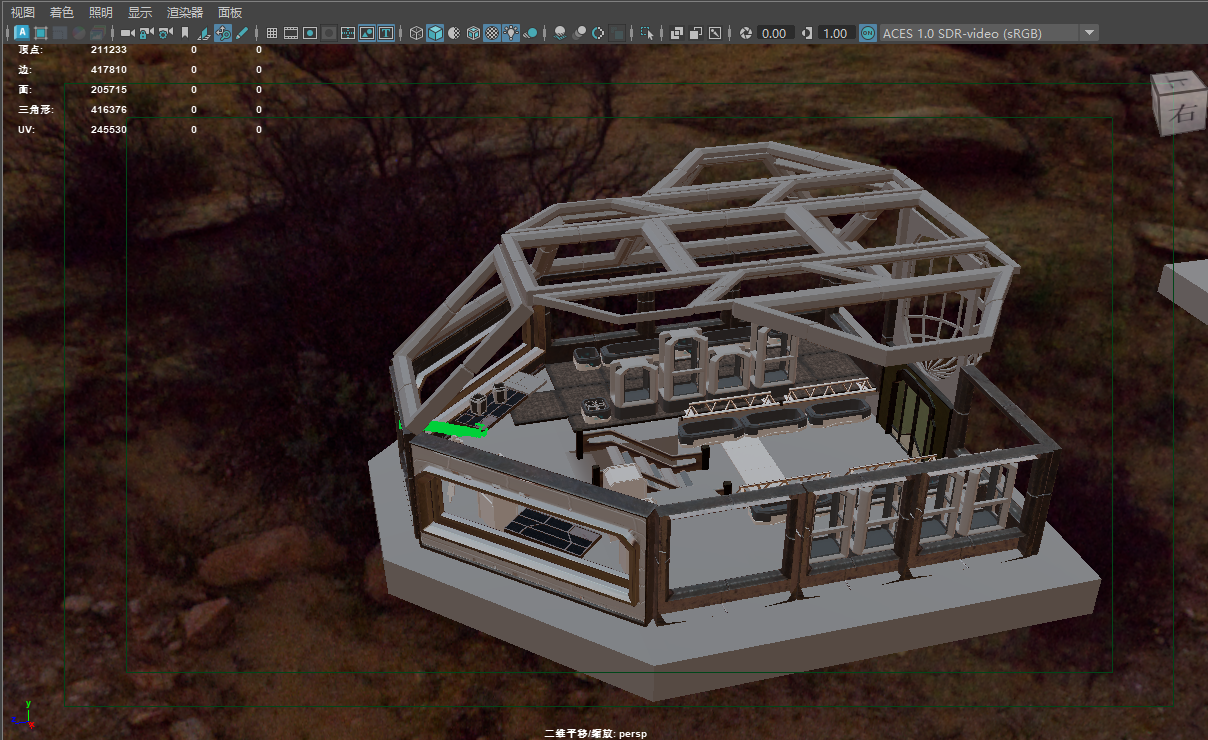
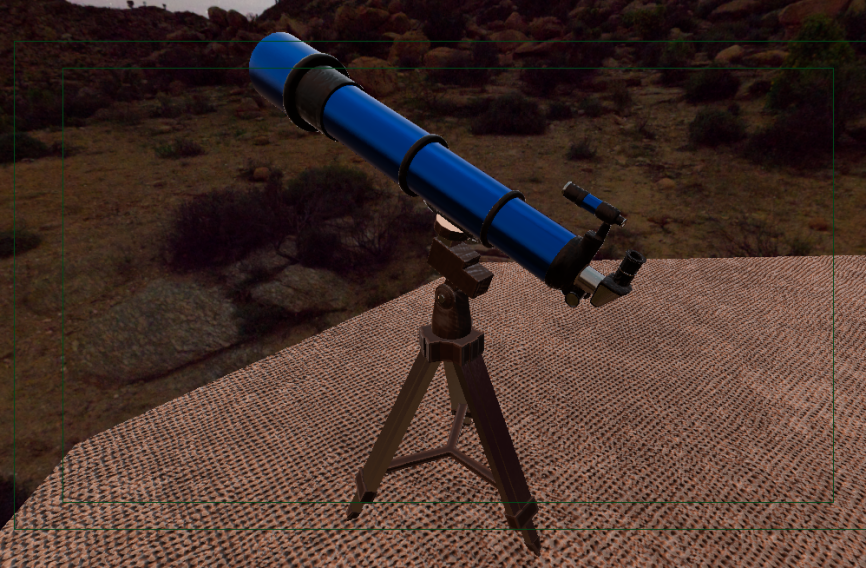
The scene was built as a modular kit rather than a single mesh: floor tiles, barriers, barrier windows, a doorway, stairs, a viewport, plus set-dressing props (cultivator basins, a table, a cup, a telescope). The dome is a structural lattice, which is what sets the silhouette and does most of the compositional work before any texture exists.
Working in white this long is the right call for a scene like this. With the geometry counters visible in the viewport, form and readability get judged on their own, and the poly budget stays a conscious decision instead of an accident discovered at render time.
2. Geometry Integrity — the gate I learned to respect
Early in the project Maya's Unfold simply failed. The cause was non-manifold geometry and "bowtie" vertices — topology that has no valid flattened solution, so the algorithm has nothing to solve.
The fix was to adopt a strict mesh cleanup protocol as a standing step rather than a rescue operation: hunt down T-junctions, merge stray vertices, and verify the mesh is watertight and manifold before it is allowed downstream.
This is the stage that a portfolio render never shows and the one that determines whether the rest of the pipeline is even possible. From an environment art standpoint the lesson is procedural, not artistic: cleanup belongs immediately after modelling each kit piece, because a broken mesh does not announce itself until UV or render, by which point the cost of tracing it has multiplied.
3. UV & Texel Density
With clean topology, UVs became the next failure point. Several components suffered UV explosions and extreme stretching, which showed up as blurry, "barcode-like" texture on the table surfaces — the classic symptom of wildly uneven texel density rather than a texturing mistake.
The resolution came from choosing the algorithm to suit the surface rather than using one everywhere: planar mapping for flat, panel-like faces and Unfold3D for the more organic shells, then checking that texel density stayed uniform across the modular floor tiles. Uniform density across a modular kit matters more than perfect packing on any single piece, because tiles sit next to each other in the final scene and any density mismatch reads instantly as a seam.
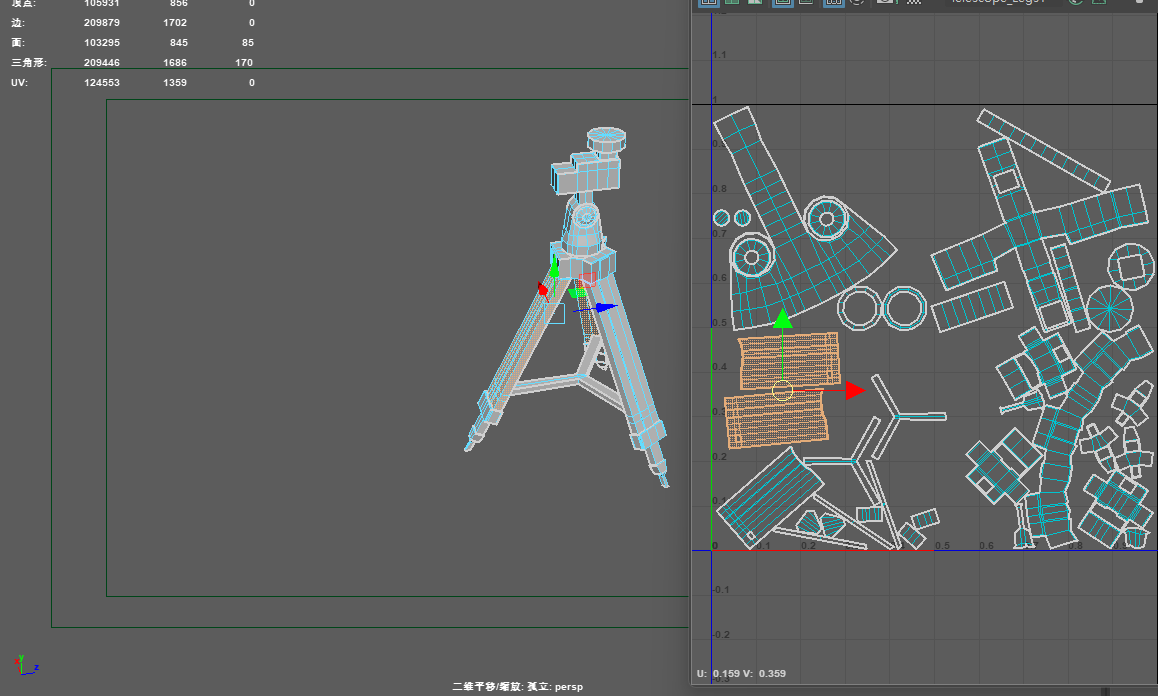
This was the hardest part of the project, and the comparison I keep returning to is wrapping a gift without wrinkles — the surface is fixed, so all the skill sits in where you choose to cut.
4. Texturing in Substance Painter
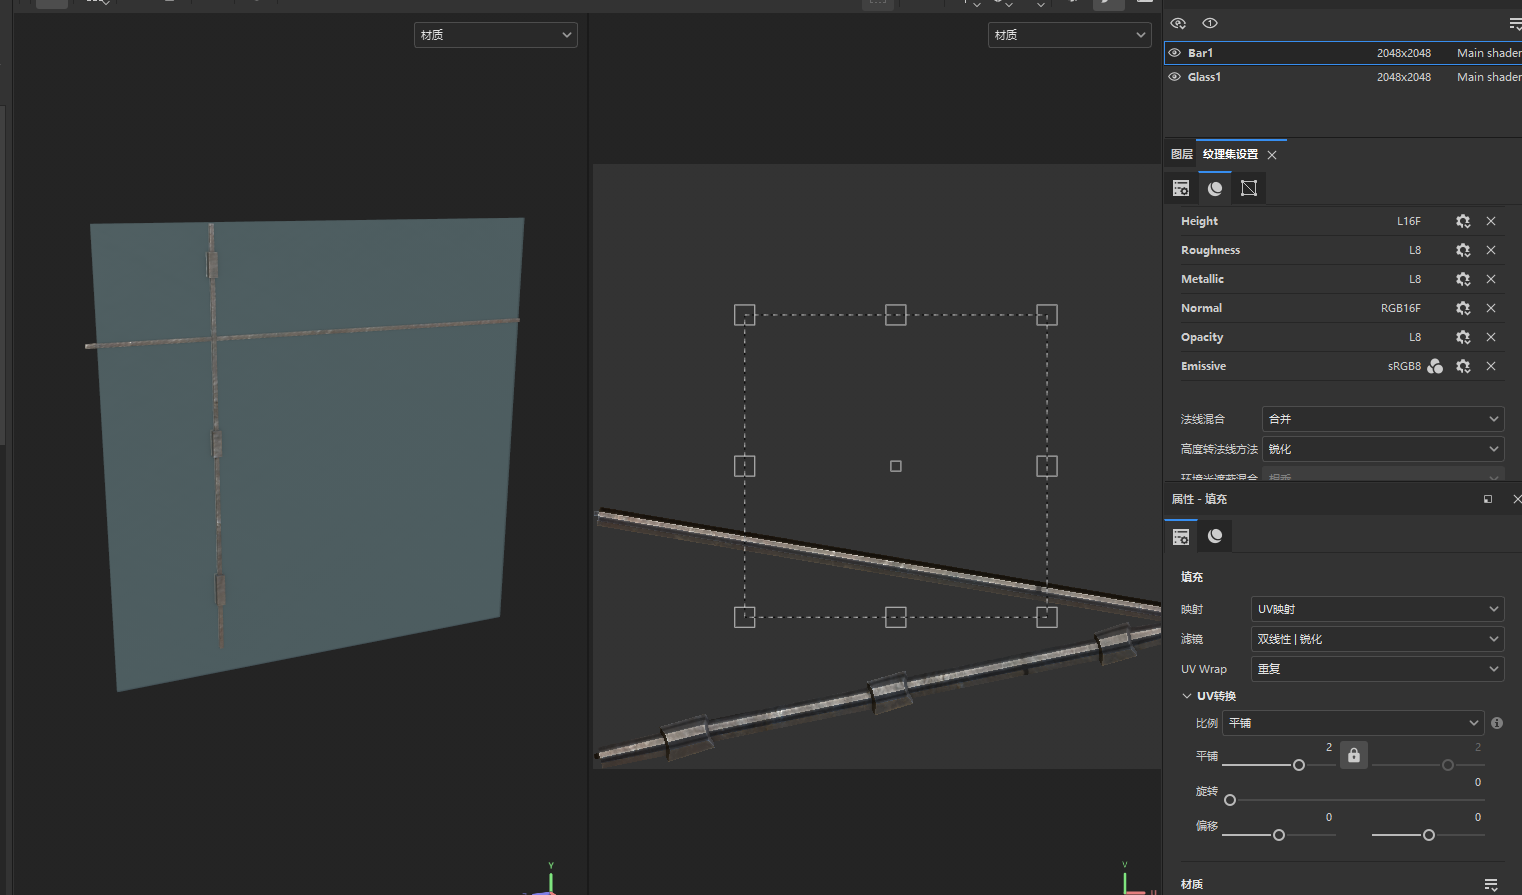
Texturing was organised as one texture set per asset at 2048² — FloorTile, Barriers, BarrierWindow, Doorway, Stairs, ViewPort, BasinCultivater, LowCultivater, Table, Cup, DataBase, Ground. Naming sets after the kit pieces is what keeps a modular scene navigable; the one weak point visible in my own project window is a set still carrying the default Standard_Surface name, which is exactly the kind of thing that becomes unfindable once a scene grows.
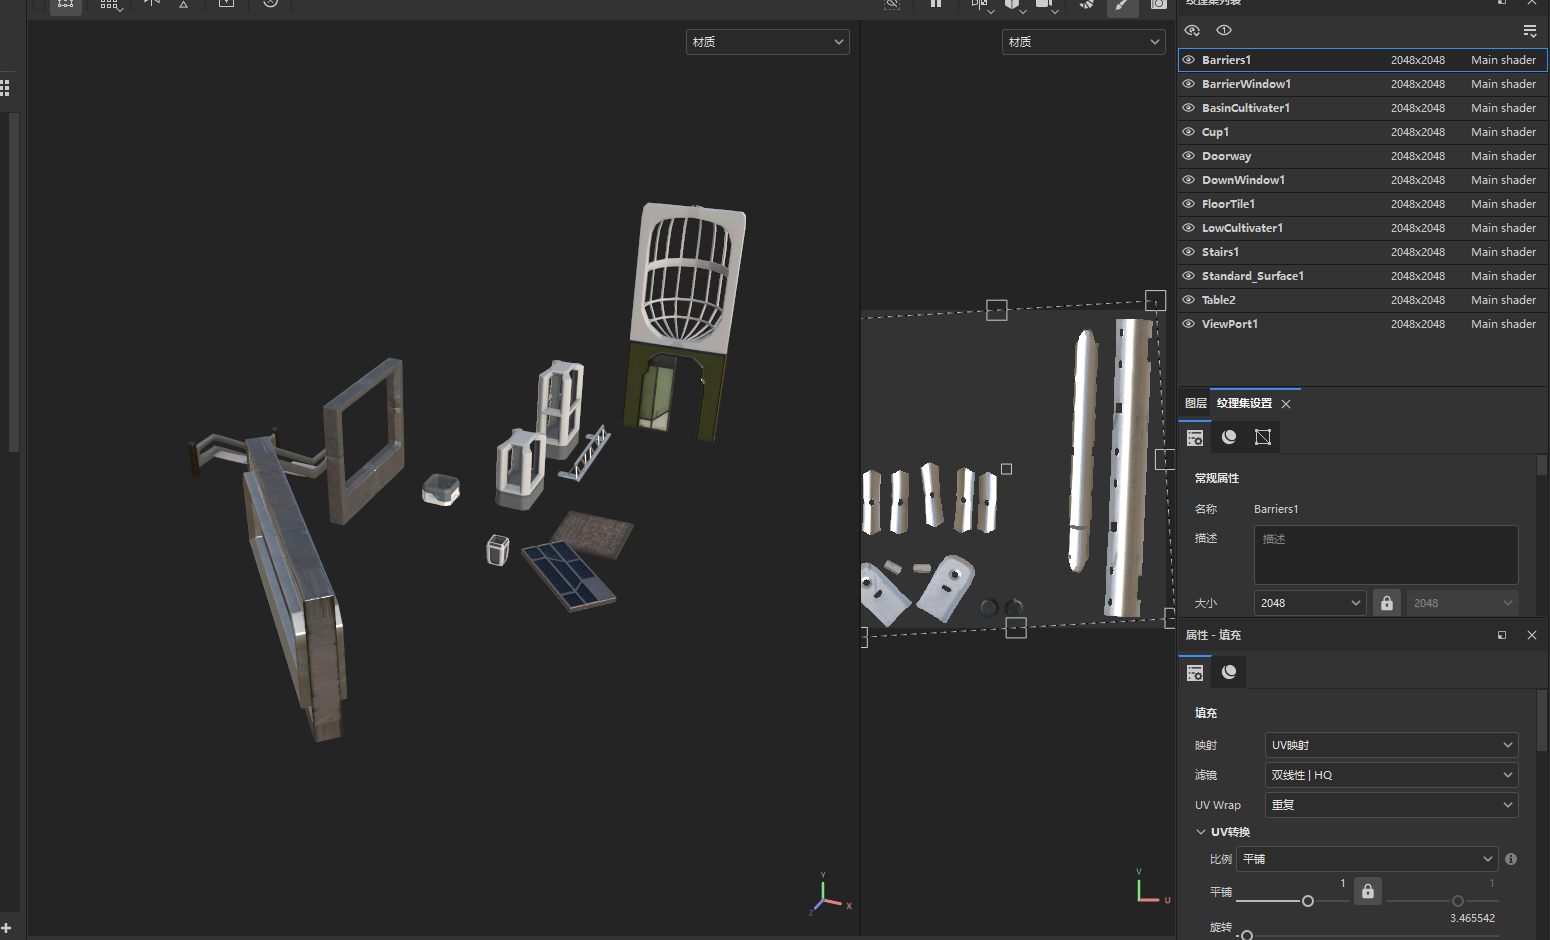
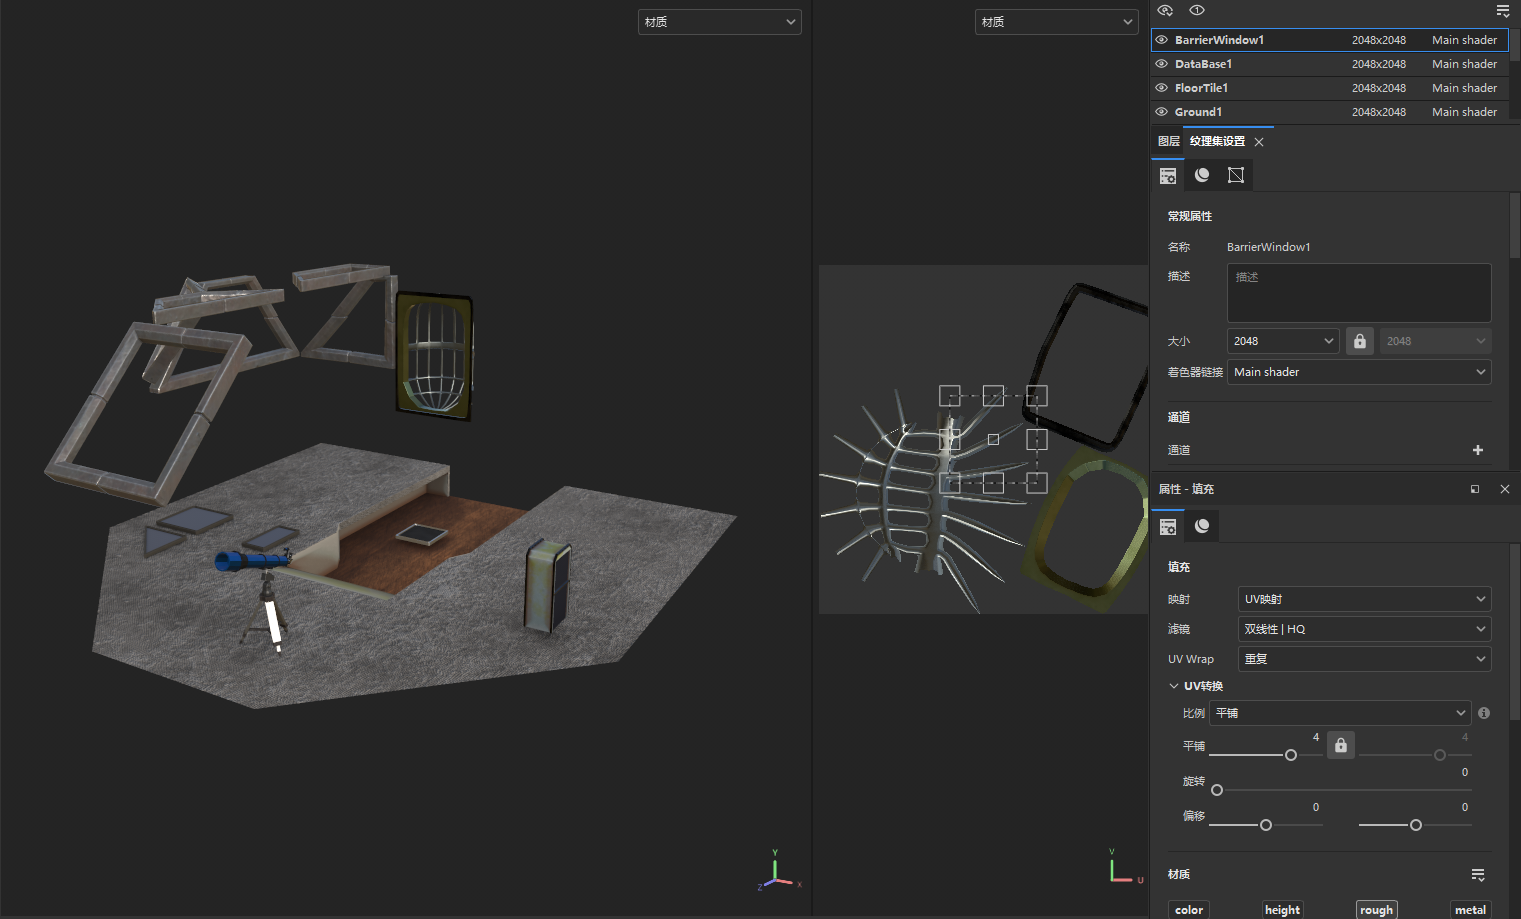
The channel stack was authored as full PBR — height, roughness, metallic, normal, opacity and emissive. Carrying opacity and emissive through the export is what allows the glass panels and the lit elements to behave correctly once they reach Arnold, rather than being faked later in comp.
5. Material Assignment & Lookdev in Maya
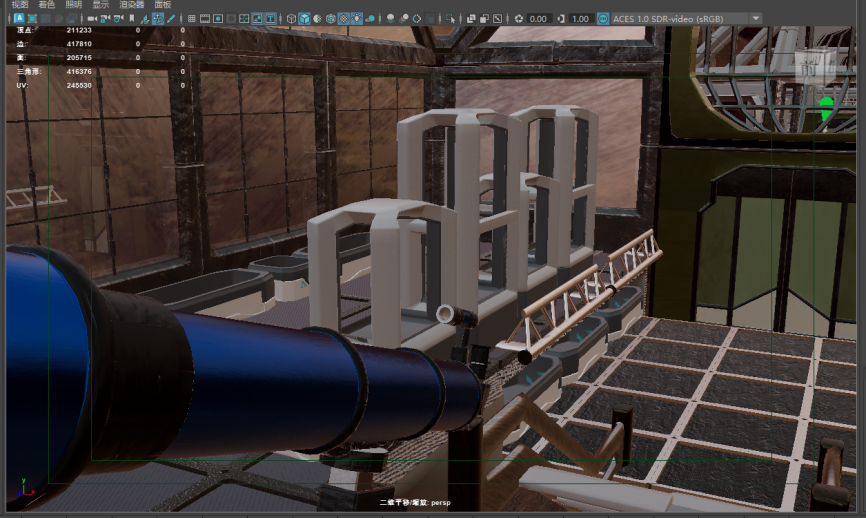
Back in Maya the maps were assigned per texture set and the scene was viewed under ACES 1.0 SDR-video (sRGB) colour management, so that what I judged in the viewport matched what Arnold would ultimately produce. Setting colour management before lookdev rather than after is a small discipline that saves re-authoring albedo later.
The useful thing about assembling in passes is that the scene stays reviewable throughout: in the interior below, textured architecture sits alongside props still in white, which makes it obvious which assets have cleared the pipeline and which have not.
6. Set Dressing & Foliage
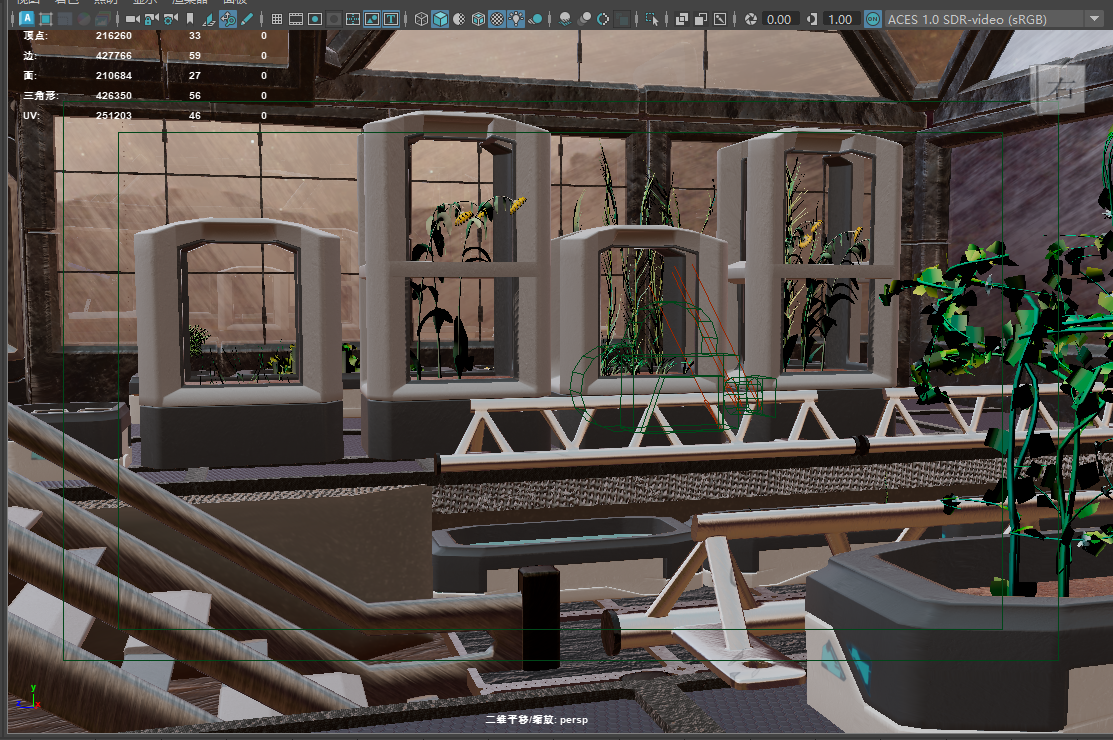
The greenhouse cultivators are what give the base its narrative — a lunar habitat growing food — so the foliage carried real weight rather than being filler.
It also produced the most instructive pipeline failure of the project: flora authored with Paint Effects appeared correctly in the viewport and then vanished from the final render. The cause is a hard boundary rather than a bug — Arnold cannot render native Maya strokes. The fix was to convert the Paint Effects to polygons and apply Arnold standard shaders to the result.
The general principle worth carrying forward is to distrust anything that lives only in the viewport. A renderer-agnostic scene needs its content in geometry and shaders the renderer actually understands, and that conversion should happen while dressing, not the night before a render.
7. Lighting & Rendering in Arnold
Two problems dominated the render stage.
Z-fighting produced flickering black artefacts across the floor. This was not a render setting at all but a geometry symptom — coincident, overlapping surfaces — and it was fixed by eliminating the duplicate geometry rather than by biasing anything in the renderer. It is the third time in this project that a render-stage symptom turned out to have a modelling-stage cause.
Noise and render time were the other constraint, worsened by running the GPU renderer with depth of field. Rather than raise sample counts globally, the solution was adaptive sampling paired with the OptiX denoiser, which produced clean frames from comparatively low initial samples — the practical trade for a solo project with a deadline.
8. Compositing & Output
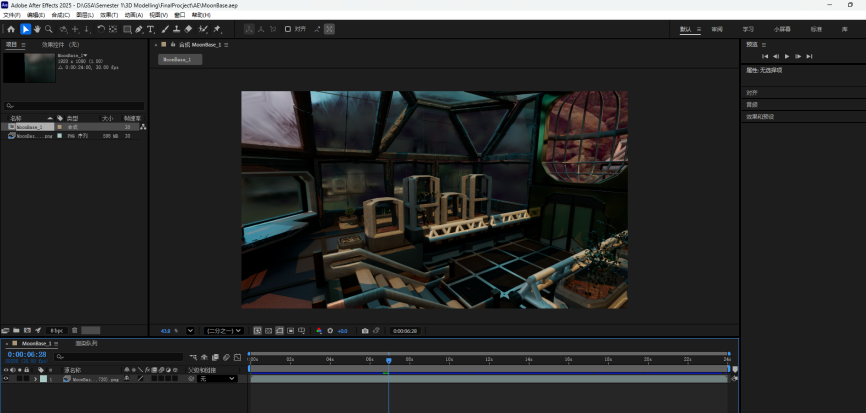
Final frames were assembled as a sequence in After Effects for the turntable and camera move that present the scene.
This stage also exposed two shot-level errors I would fix first on a second pass: foregrounds left fuzzy by depth of field pushed too hard, and a camera moving too fast for the viewer to read the space. Both are cheap to correct and both are decisions made in the last 5% of the pipeline that undercut work done in the first 95% — a good argument for blocking out camera moves early instead of treating them as delivery packaging.
Pipeline Review
Reviewing the whole run, the clearest conclusion is that 3D art is about half building and half cleaning. I started out wanting the scene to look striking, and learned quickly that if what sits under the hood — clean topology, sane UVs, non-overlapping geometry — is wrong, the project breaks somewhere further down, and always at a stage where diagnosis is more expensive.
Three of the four failures I hit were the same failure wearing different clothes: Unfold refusing to run, textures reading as barcodes, and the floor flickering in render were all geometry problems surfacing one stage late. The fix is procedural rather than skill-based — clean each asset as it is finished instead of batching cleanup at the end, which is the single change I would make to how I work.
What did transfer well was the handoff itself. Moving assets between Maya and Substance Painter and back, keeping texture sets aligned to kit pieces, and carrying a full PBR channel stack including opacity and emissive through to Arnold all held up, and I am considerably more confident operating across that toolchain than when I started.